What is a Data Disk in Virtual Machines?
Azure VMs include a default OS disk for system files and a temporary disk for volatile, non-persistent tasks (cleared on reboot). To handle lasting data needs, custom data disks can be added. These act as scalable, persistent storage units that operate independently of the VM’s lifecycle, supporting encryption, resizing, and reuse. Unlike temporary storage, they safeguard data through restarts and allow granular control for hosting apps, databases, or archives—ideal for balancing performance and durability without relying on the VM’s ephemeral resources.
This comprehensive guide will walk you through each step in adding an extra Data Disk to your virtual machine on Microsoft Azure using the Azure portal.
To add a Data Disk to a Virtual Machine, it is necessary to create the VM first.
Step 1: Login to the Azure Portal
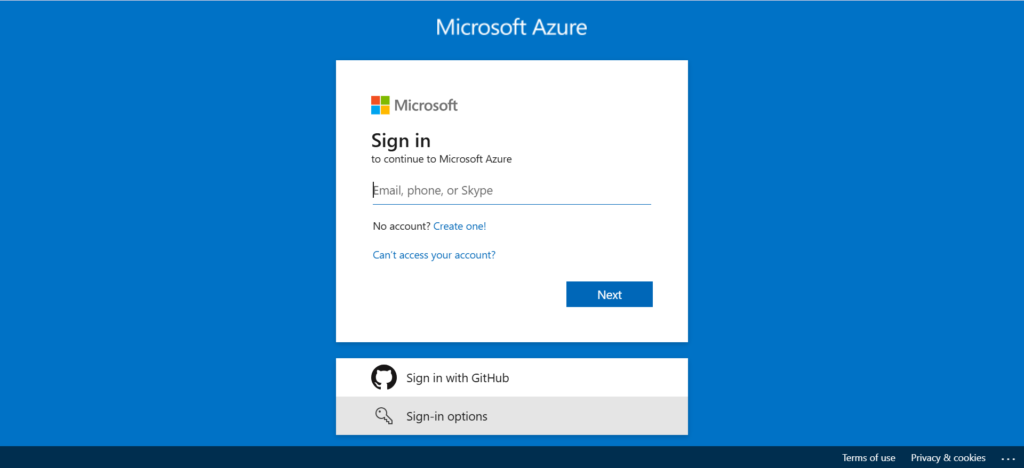
Step 2: Create your Virtual Machine
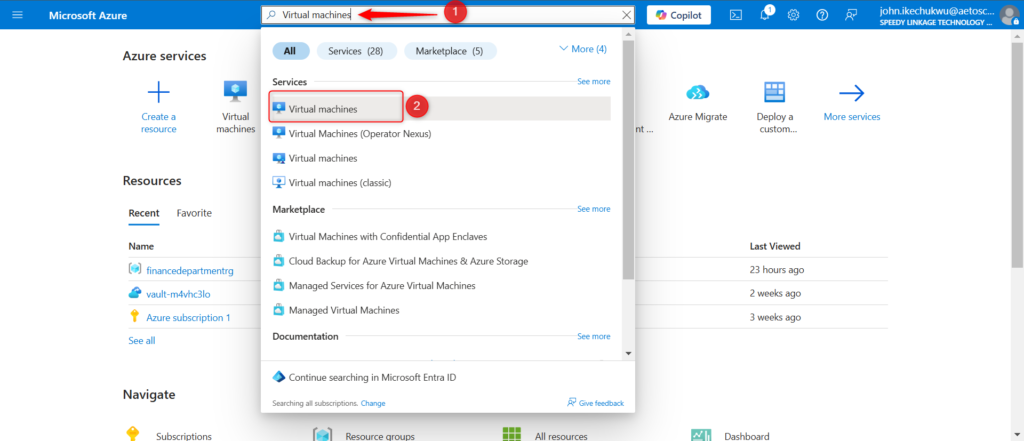
Once logged in, type virtual machines in the search bar and click enter
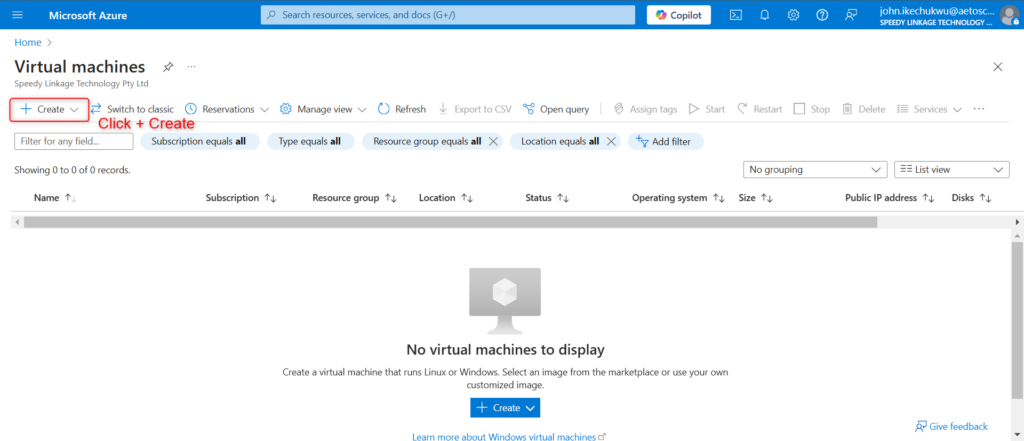
Next, click + Create.
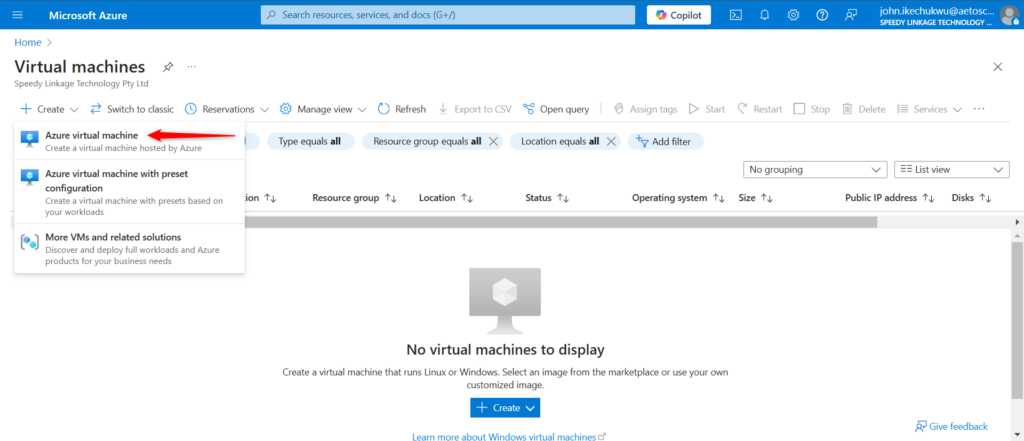
Select virtual machines from the drop down to begin the process of creating your vitual machine(VM)
On the next page, begin creating your virtual machine by selecting your subscription(in this case Azure subscription1) and click on Create new to create a resource group.
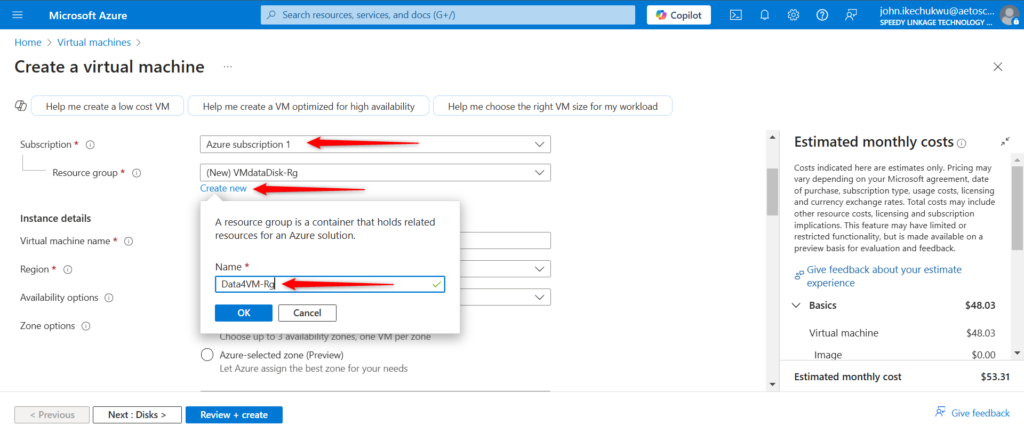
Instance Details
- VM Name: Enter a unique name for your virtual machine, making it easily identifiable.
- Region: Choose the data center region where your VM will be hosted. We choose North Europe.
- Availability Zone: Select ”Zone 2’ to increase VM redundancy. Availability Zones within a region are isolated, reducing downtime in case of hardware failure.
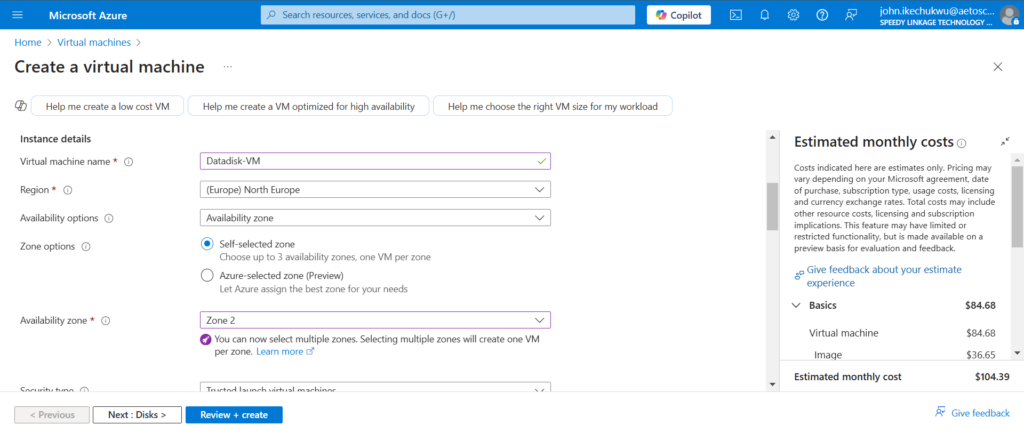
Security and Image
For security type, select Trusted Launch Virtual Machine from the drop down and for the image, select Windows Server 2022 Data Centre: Azure Edition Hotpatch -x64 Gen2.
The image represents the OS(Operating System) of the VM.
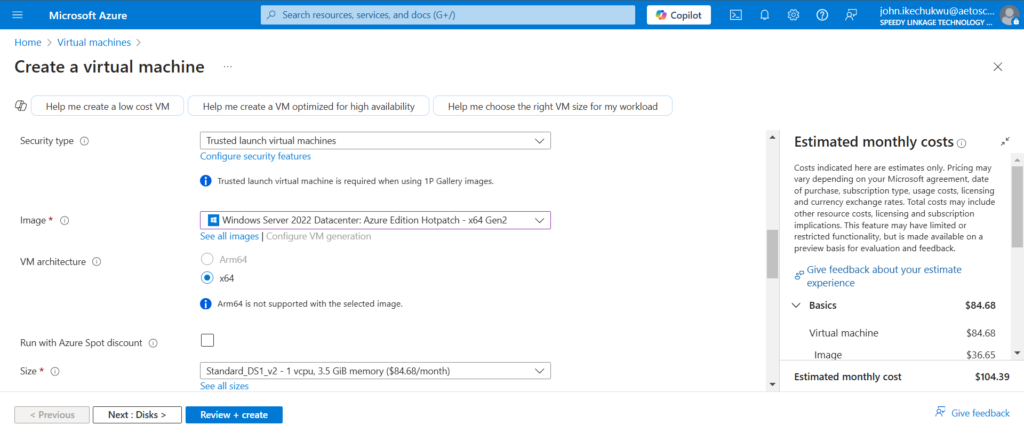
Step 3: Configure Admin Account and set inbound Port Rules
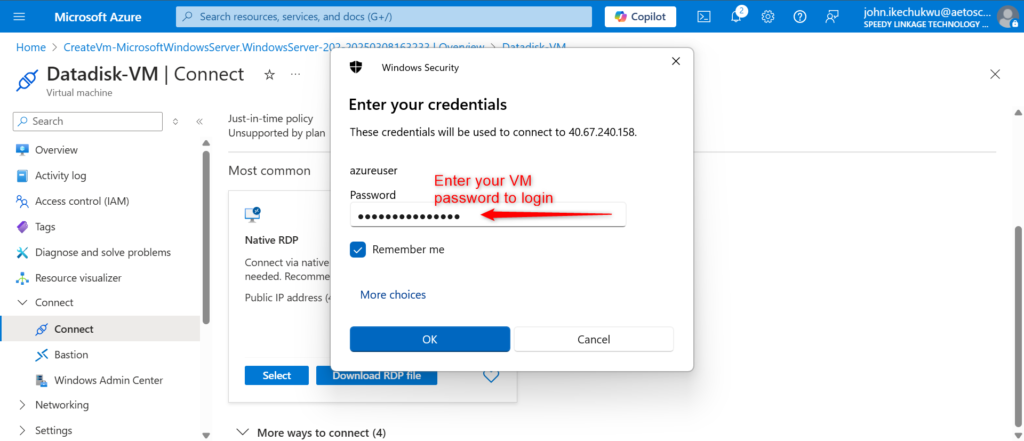
Set your Virtual Machine’s username(azureuser) and password. Copy and paste keep these information in a word document. You’ll need the to login into the VM.
Next, in the select inbound port rules section, click on the dropdown and select HTTP(80) and RDP(3389). The ports are required for the VM to communicate with the environment.
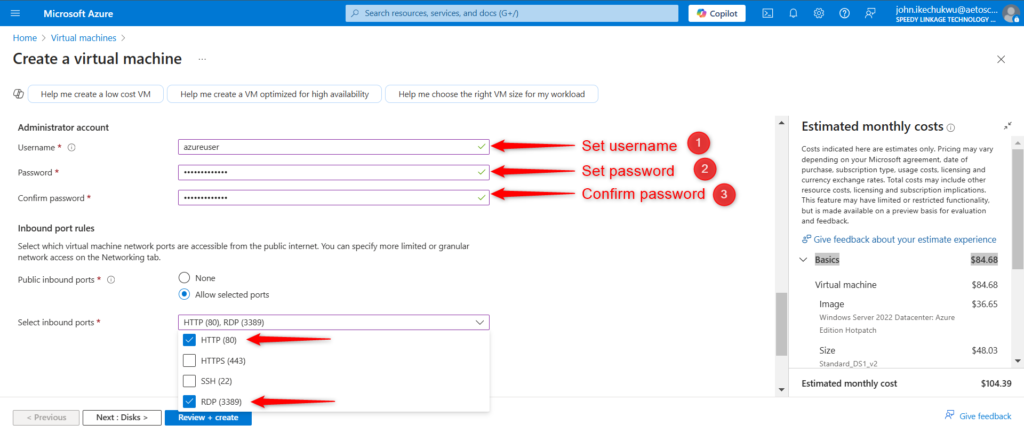
In the Licensing section, select the checkbox if you posses ans existing Windows Server license otherwise leave this unchechek. Click the second checkbox to confirm that you have an Windows Server license otherwise leave this uchecked.
Once done, click Next:Disks >

OS disk encription
By default, the system already chosen an OS disk for our VM. However, when VMs are deployed to the cloud it is to allow you to run multiple operating systems without impacting the host operating system. VMs allow you to create a safe virtual environment to test apps or even study security vulnerabilities without high risk impact to the host machine.
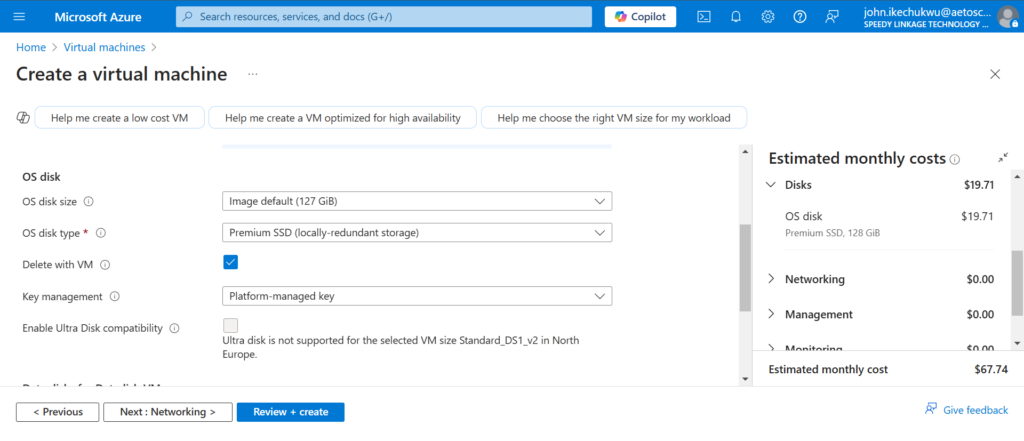
Step 4: Create Data disks for Datadisk-VM
Create and attach a new disk. We’ll leave creating this for later to avoid delays when deploying the VM later.
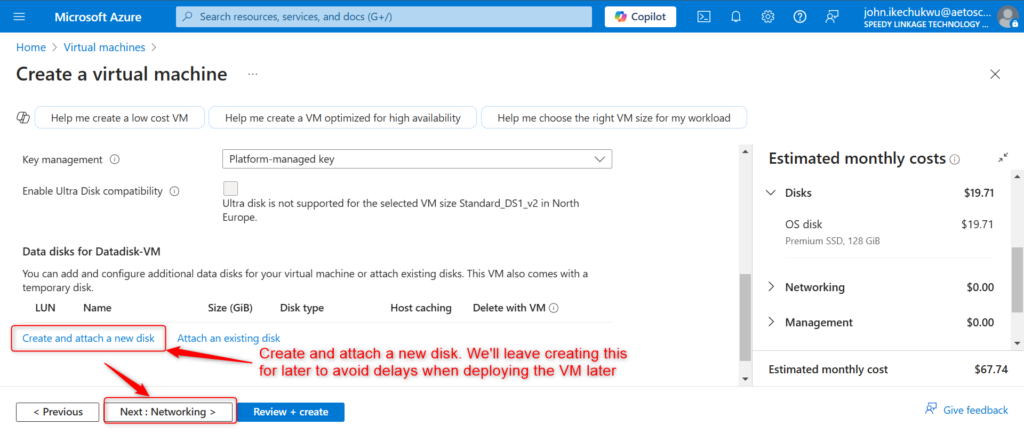
Click Next: Networking >

Disable Diagnostics
Under monitoring, disable Diagnostics
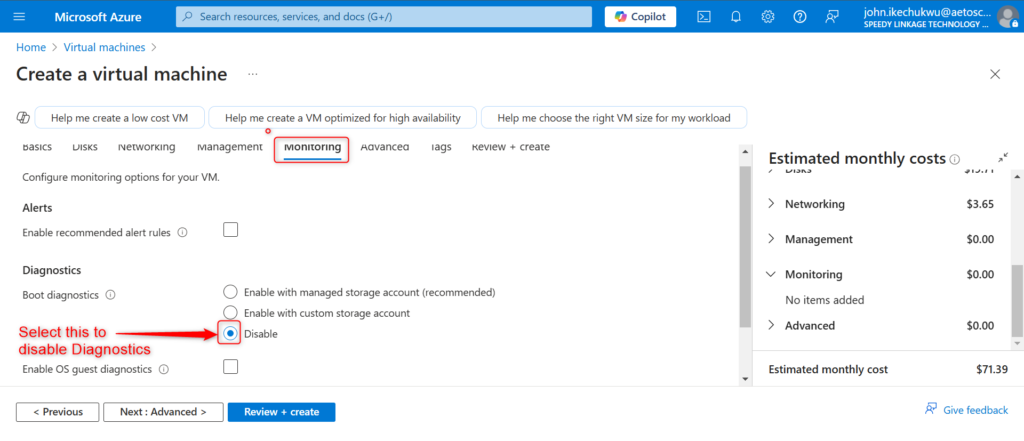
Leave things as default
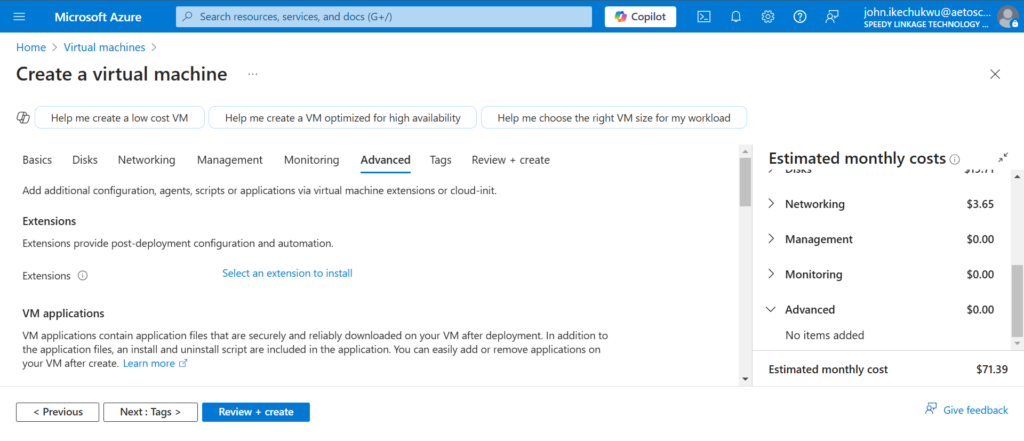
Click Next : Tags >
Fill the tags details (Name, Value and Resource). Click Review + Create
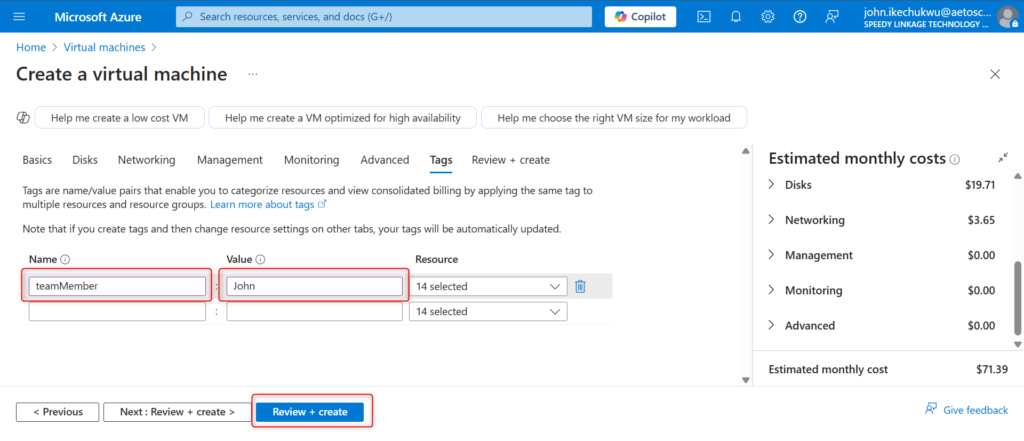
Create your Virtual Machine
Once validation is passed, click Create to initiate the process of deployoing your VM

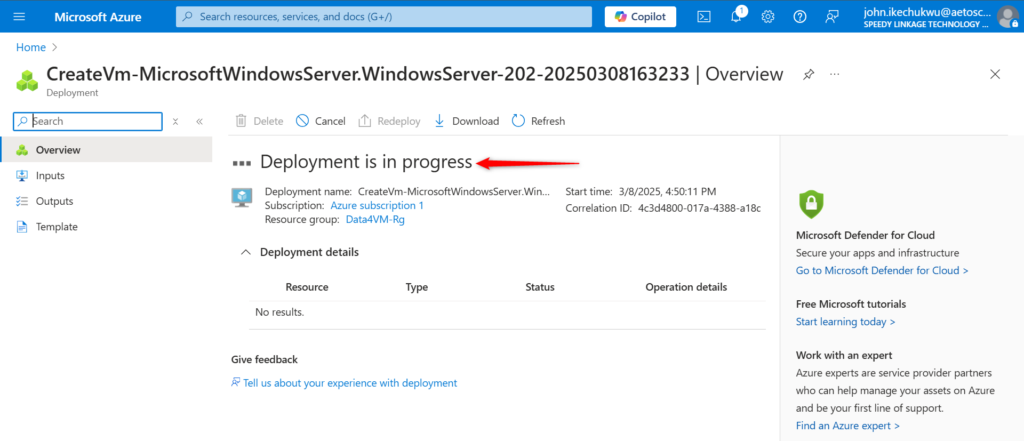
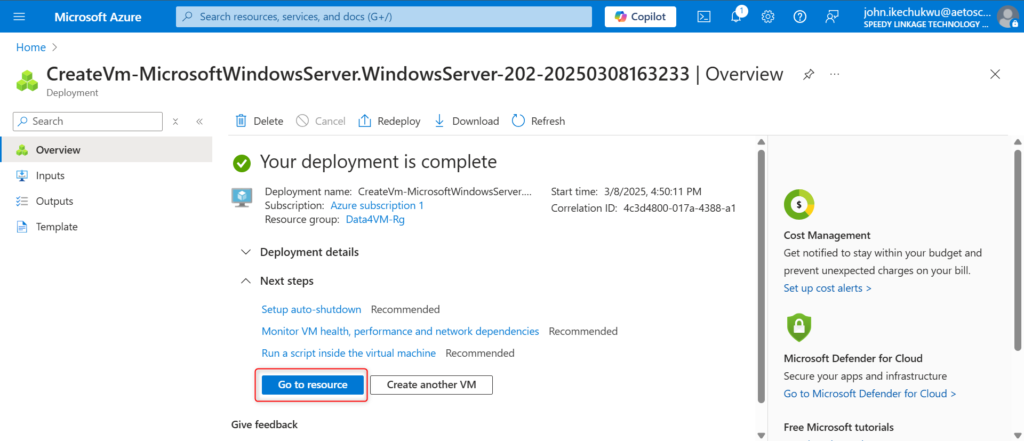
Click Go to resource and you’ll be on the overview page of your VM
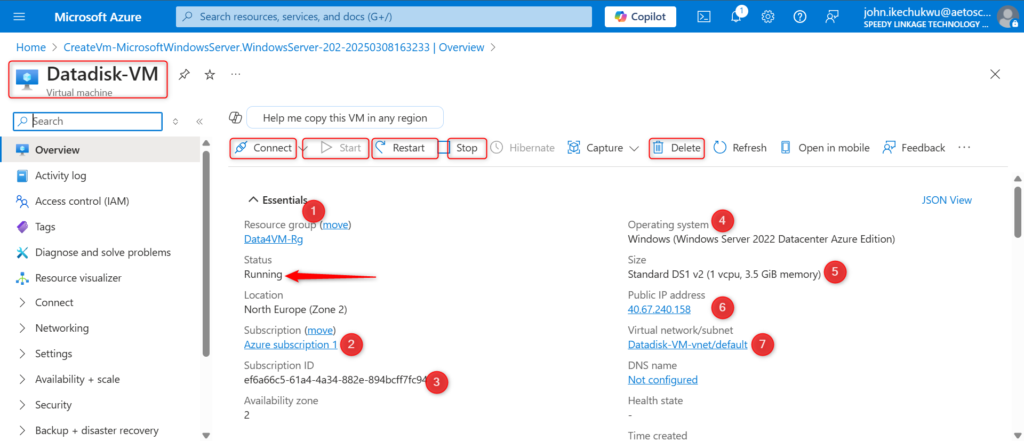
The Virtual Machine overview page
Your VM overview page lets you see at a glance all the essential details of your newly created VM. Some of which are listed below and have also been highlited for clarity. At the top of the page is the virtual machine name(Datadisk-VM).
You can see that VM essentials have been numbered and circled for easy identification
Icrease the Virtual Machine Idle timeout
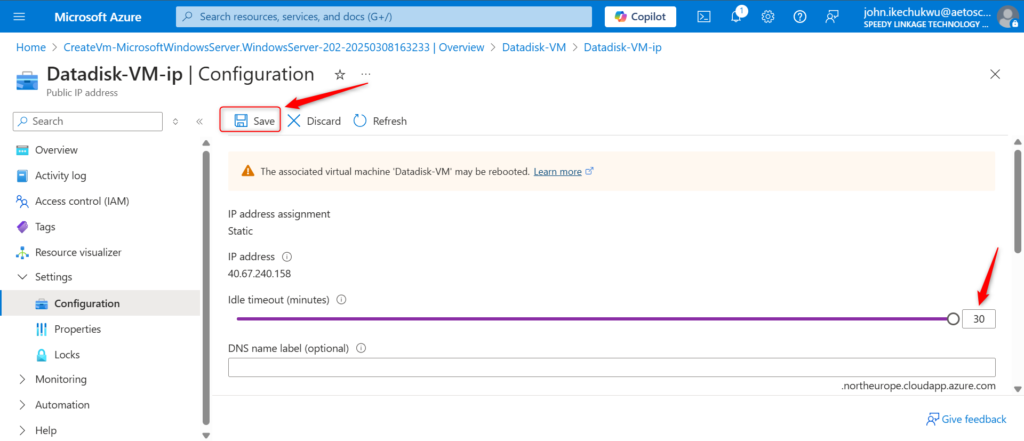
Before connecting to the VM, it is necessary to increase the Idle timeout (in minutes) form 4 to the maximum of 30. To do this, click on the Public IP address(40.67.240.158). Click Save to apply your changes.
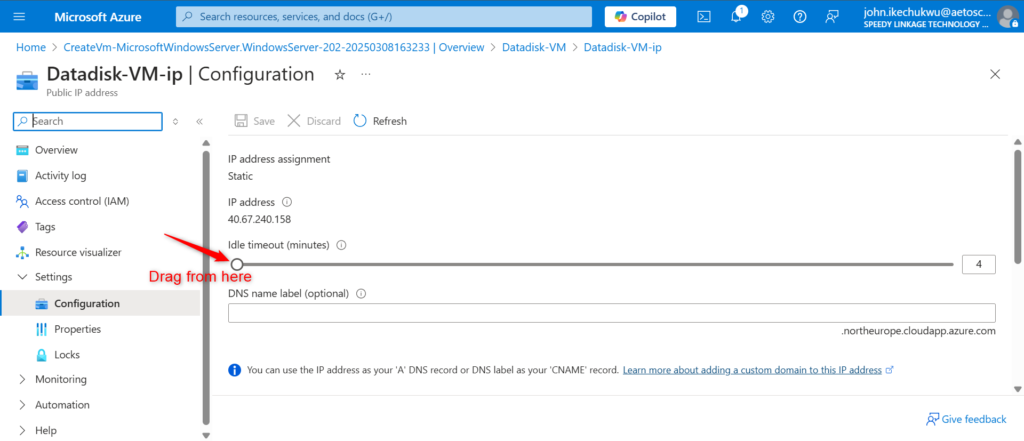
Drag the slider to the right untill it reaches 30.
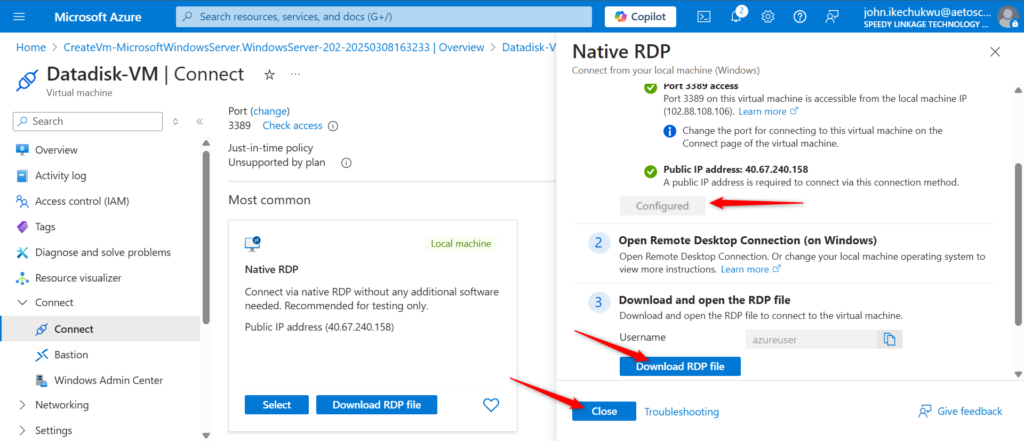
Connect To Virtual Machine via RDP
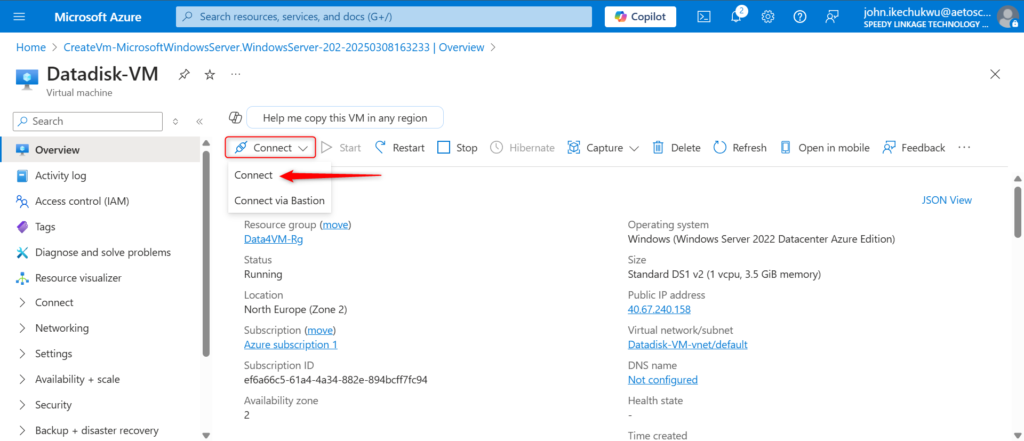
Step1: Select Native RDP
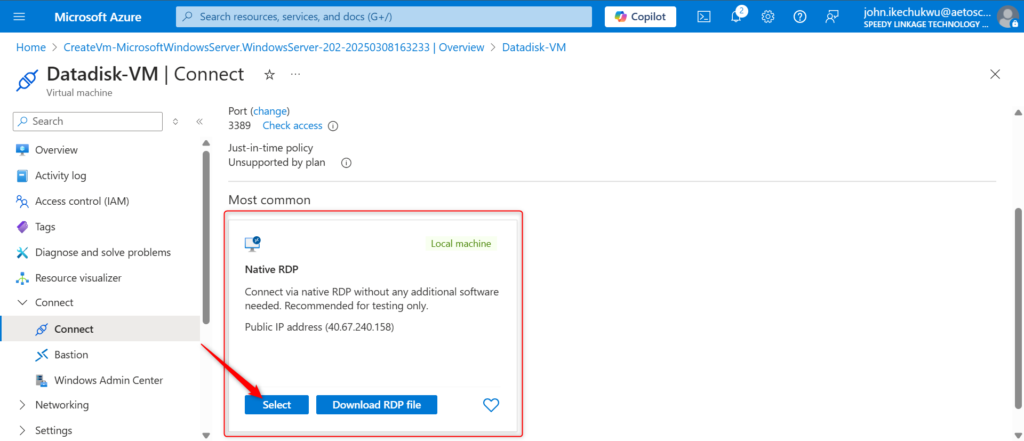
Step 2: Download RDP File
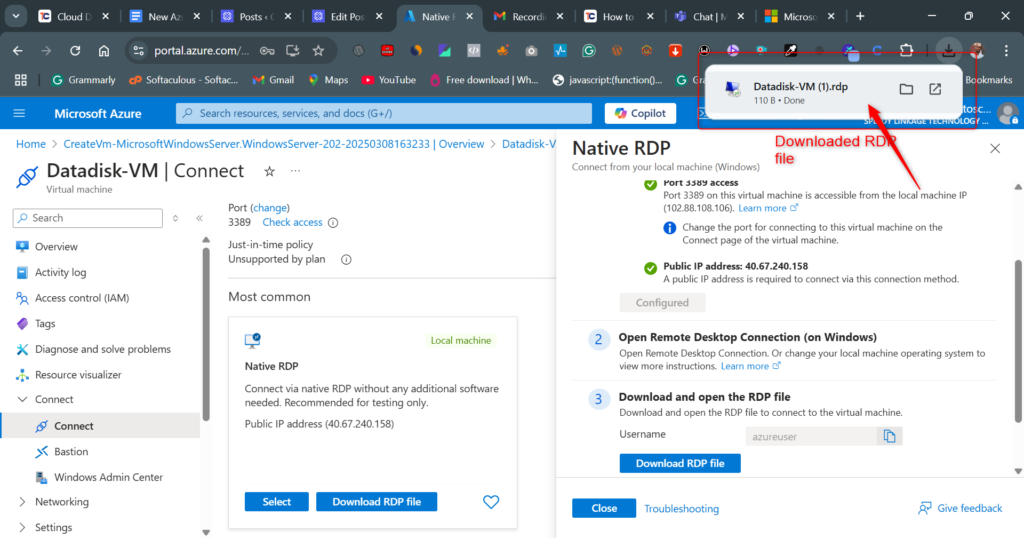
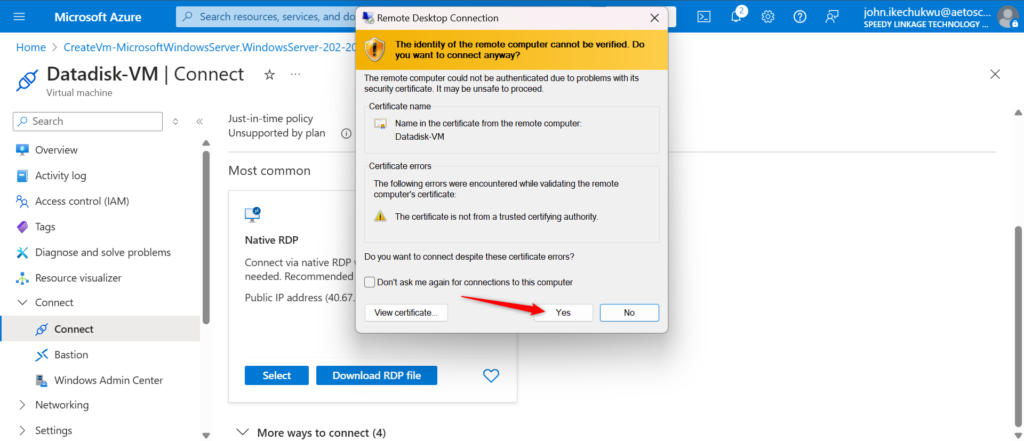
Step 3: Open RDP File
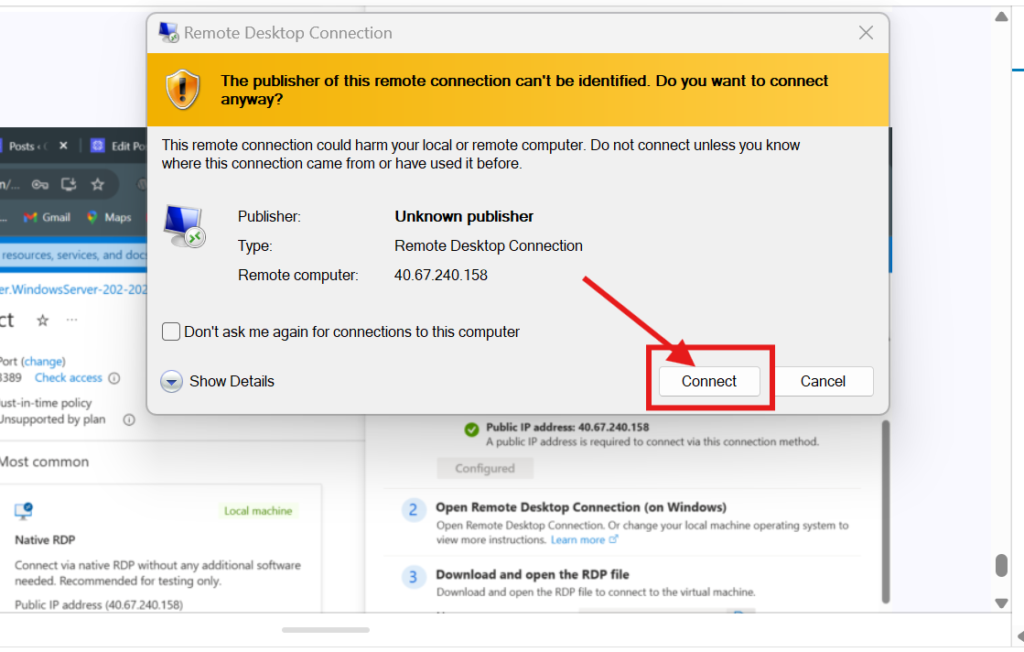
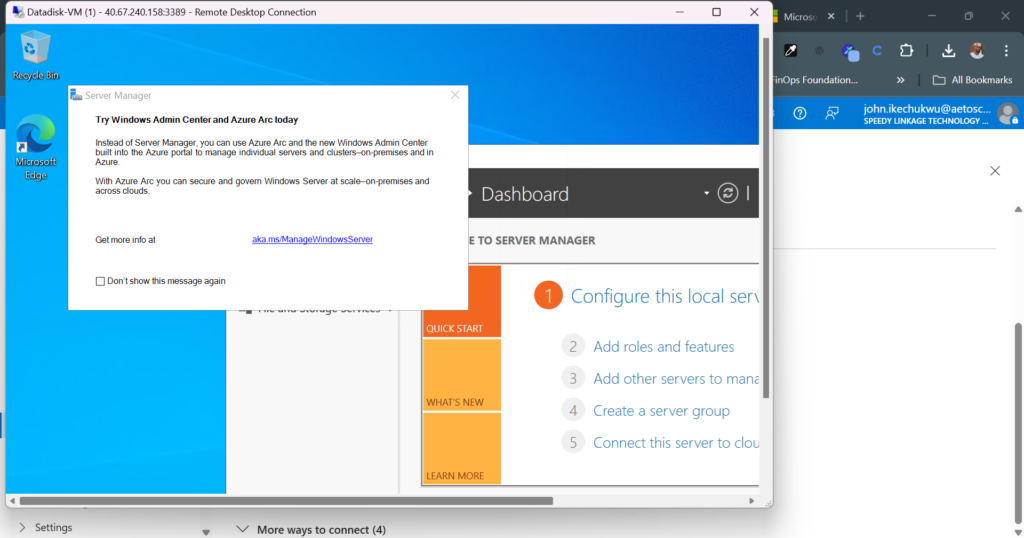
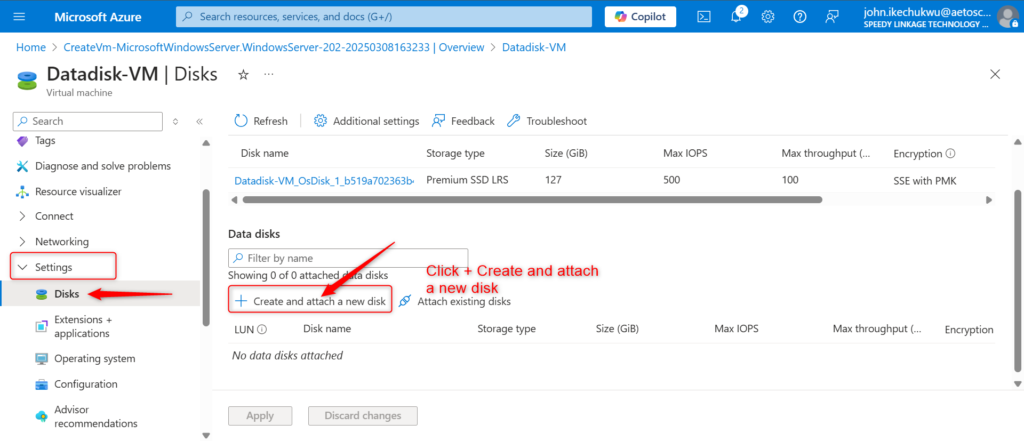
Create and attach a new disk
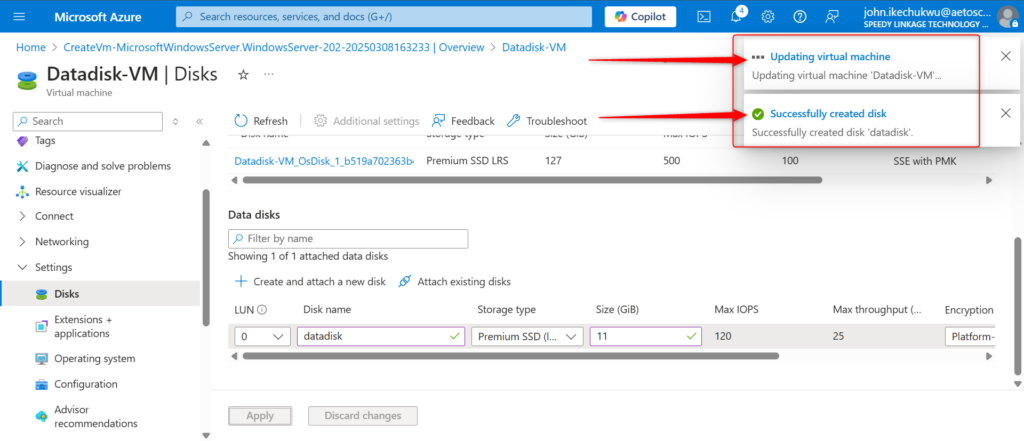
In the settings blade, select disk from the drop down. On the page that opens up, Click on + Create and attah a new disk. The procedure is well annotated in the diagram below.
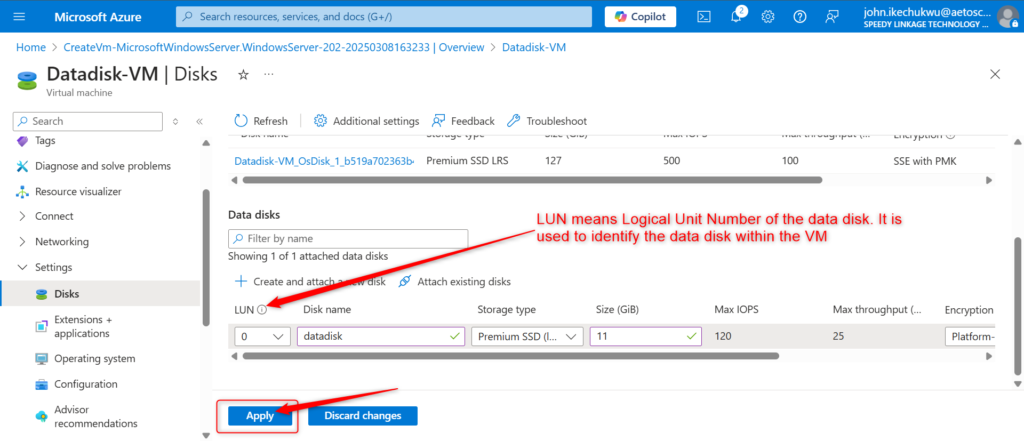
You can see that the Datadisk has been successfully created and the VM is updating.
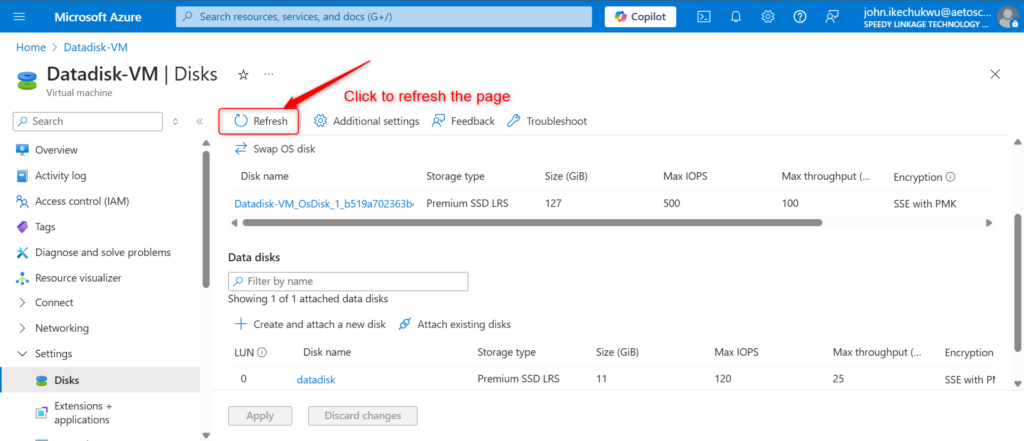
Refresh the page to see that the data disk has been created.
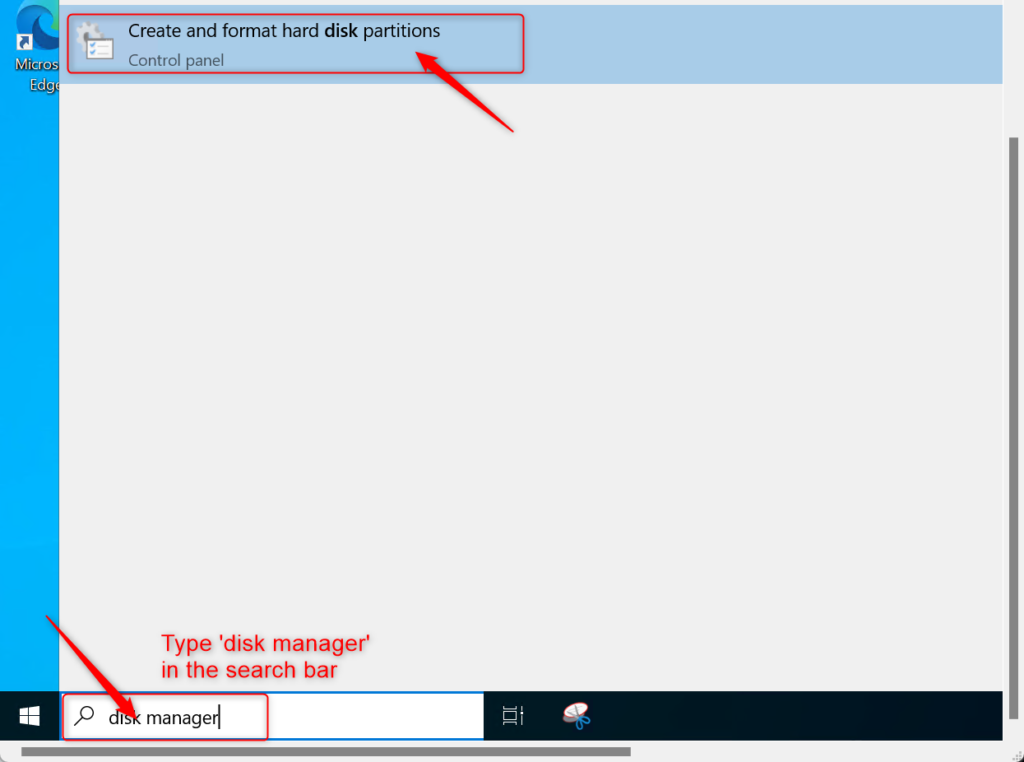
Create and format disk
In the search bar of your VM, type Disk Management. Click on Create and format hard disk partition.
Initialize the disk so as to make it usable.
Click OK to Initialize disk

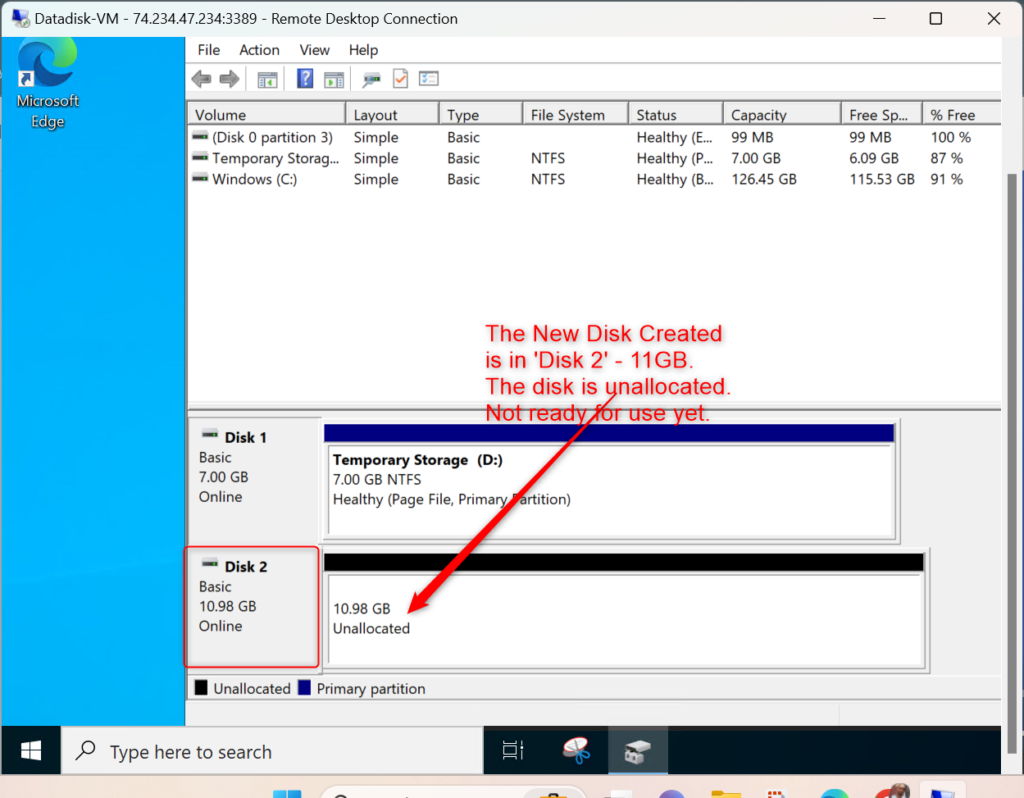
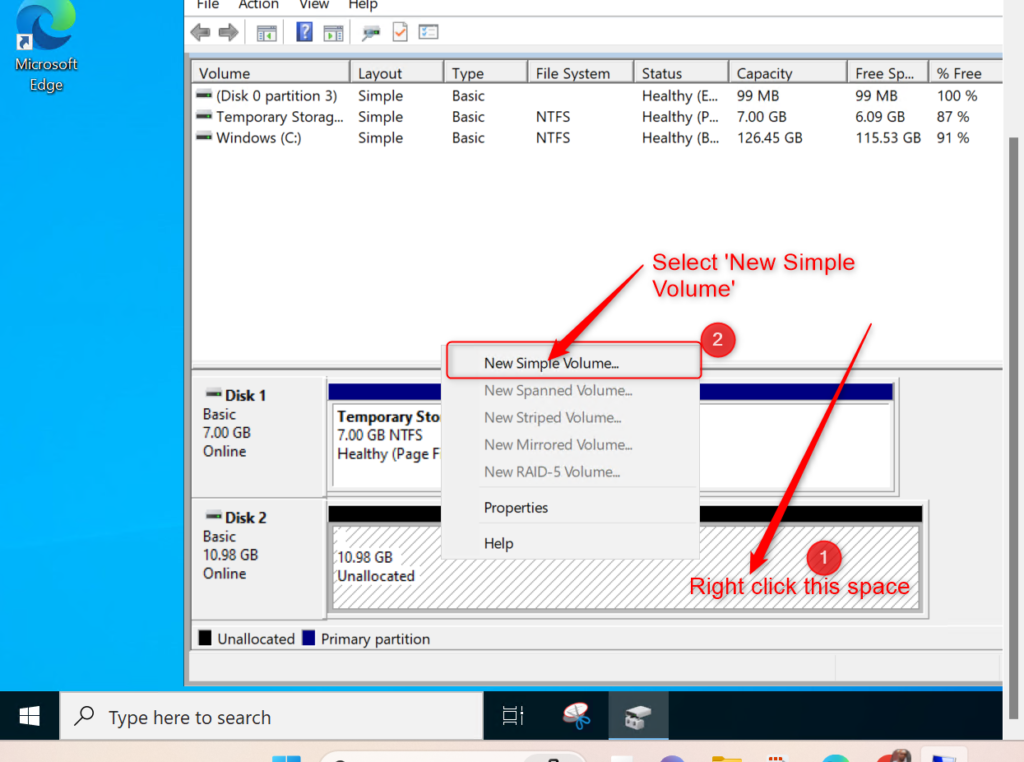
The New Disk Created is in ‘Disk 2’ – 11GB size. The disk shows that it is not yet allocated. What this means is that the disk is not yet ready for use
Format the disk
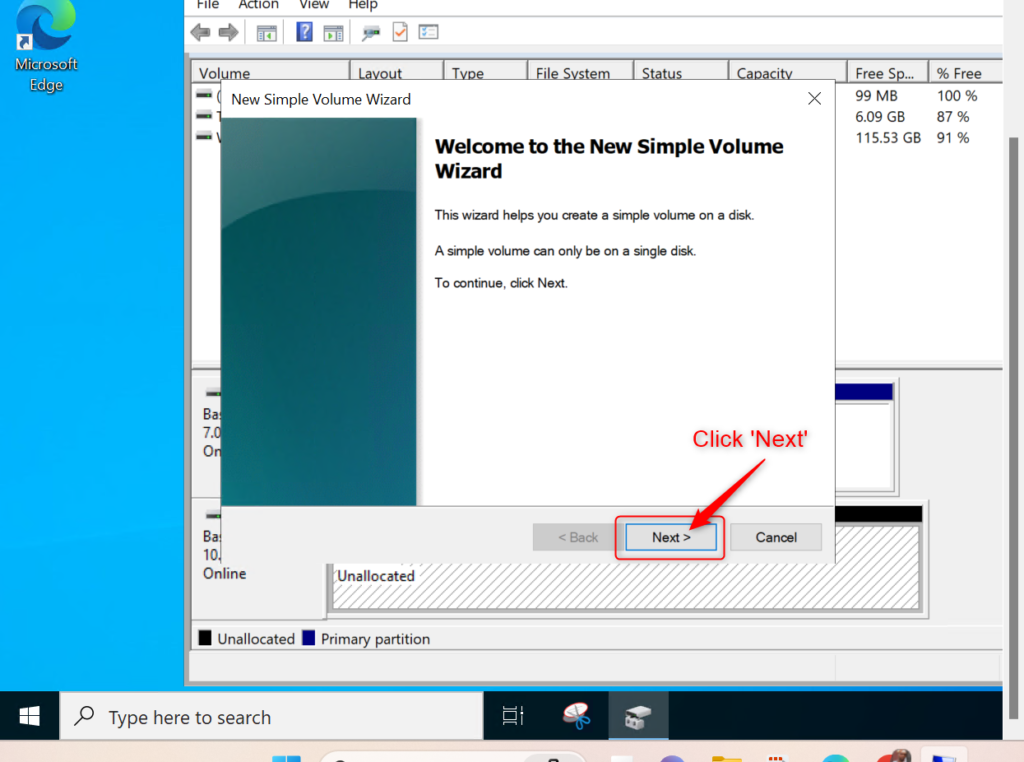
In other for the disk to be usable, it needs to be formated. The steps to formating the disk are well illustrated in the diagrams that follow:
Step 1– Right click the space labelled 1
Step 2- Select “New Simple Volume“
Click Next >
Click Next >
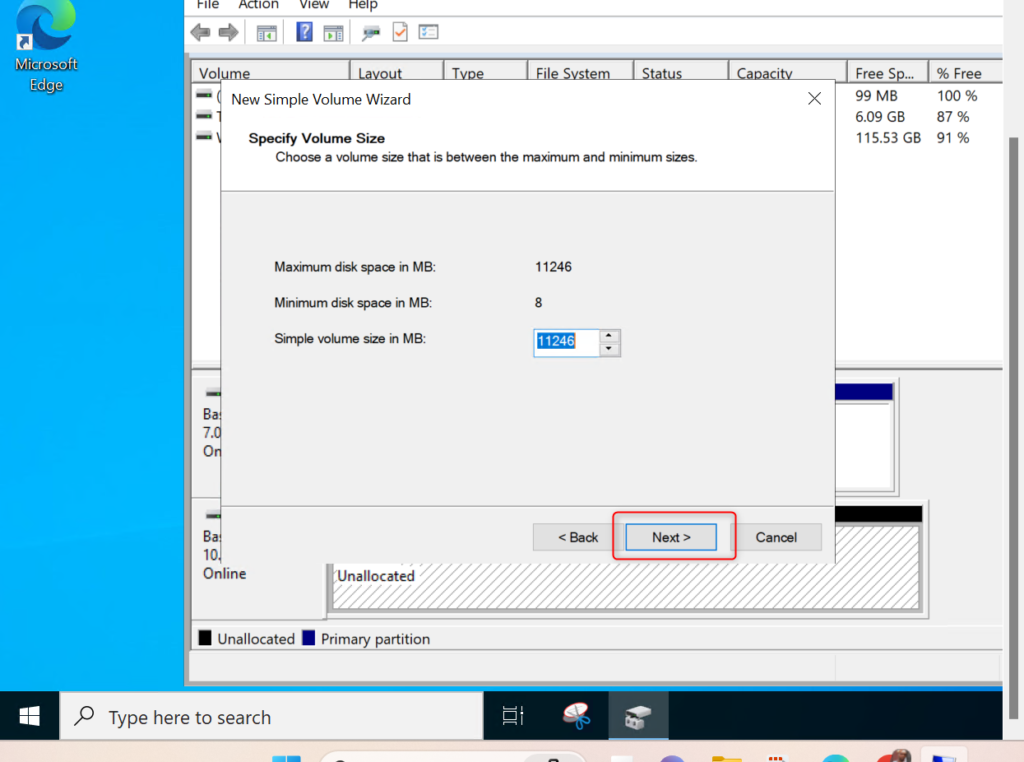
Click Next >
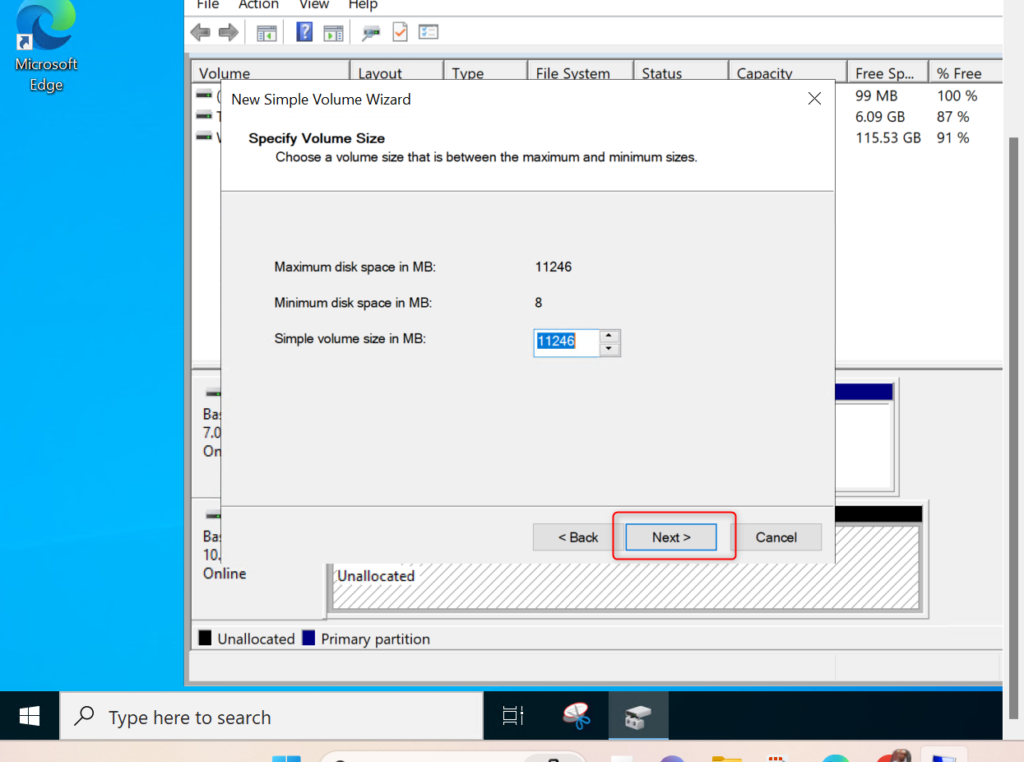
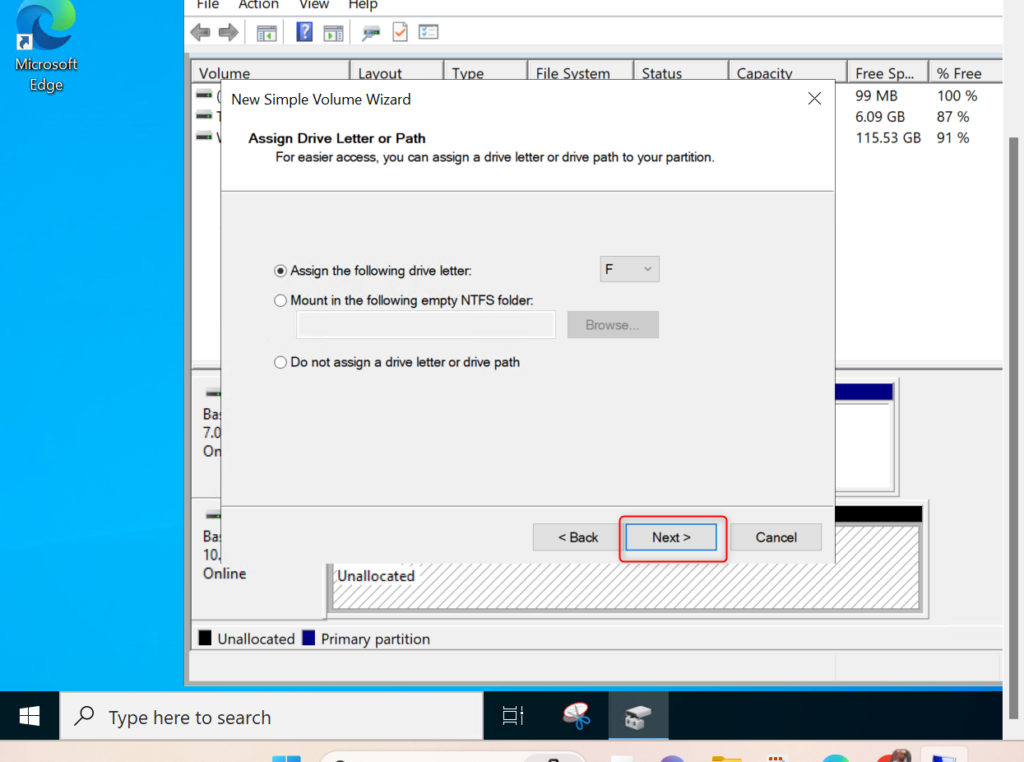
Click Next >
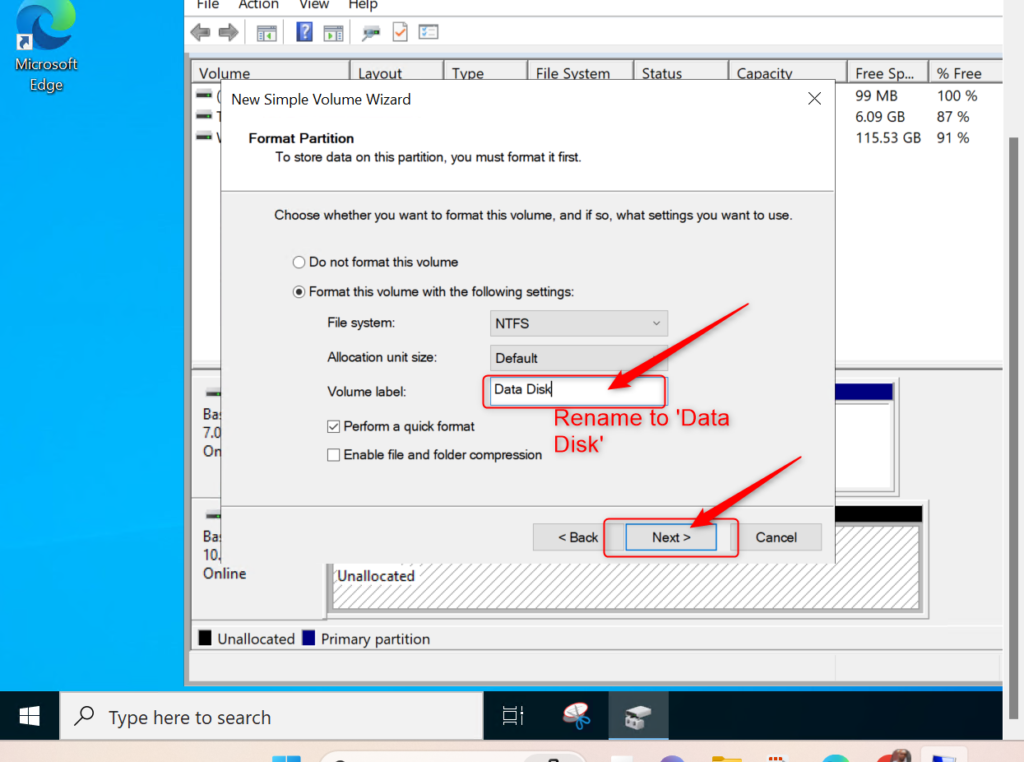
Rename the volume label field and Click Next >
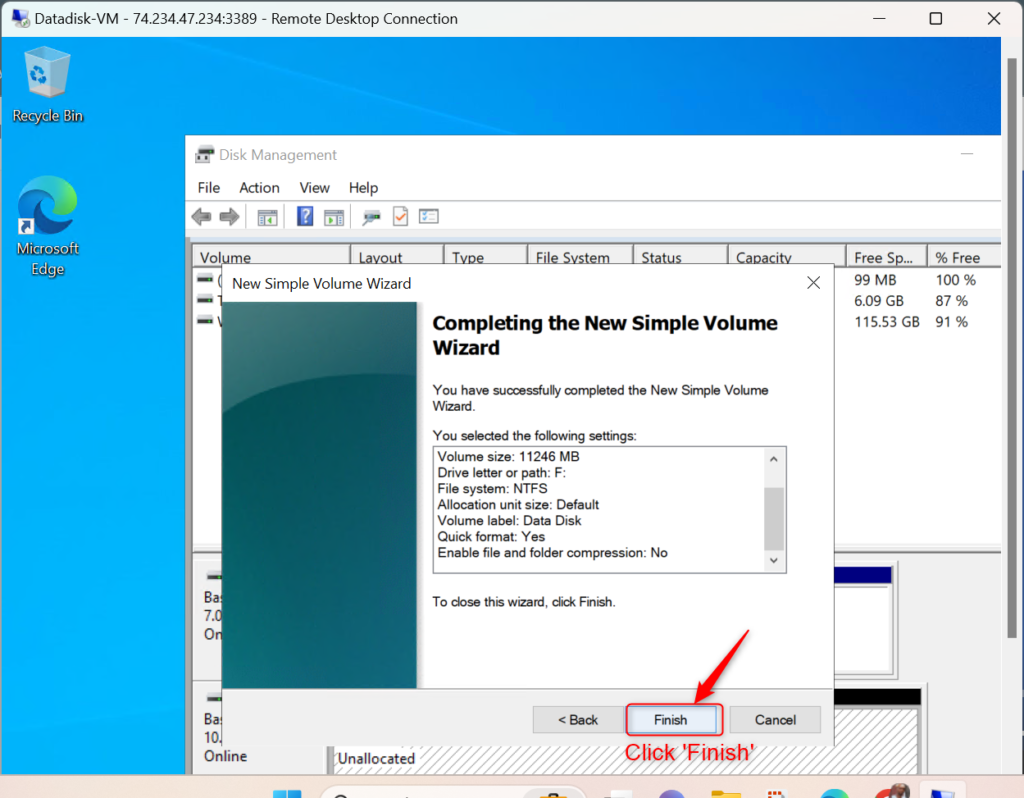
Click Finish
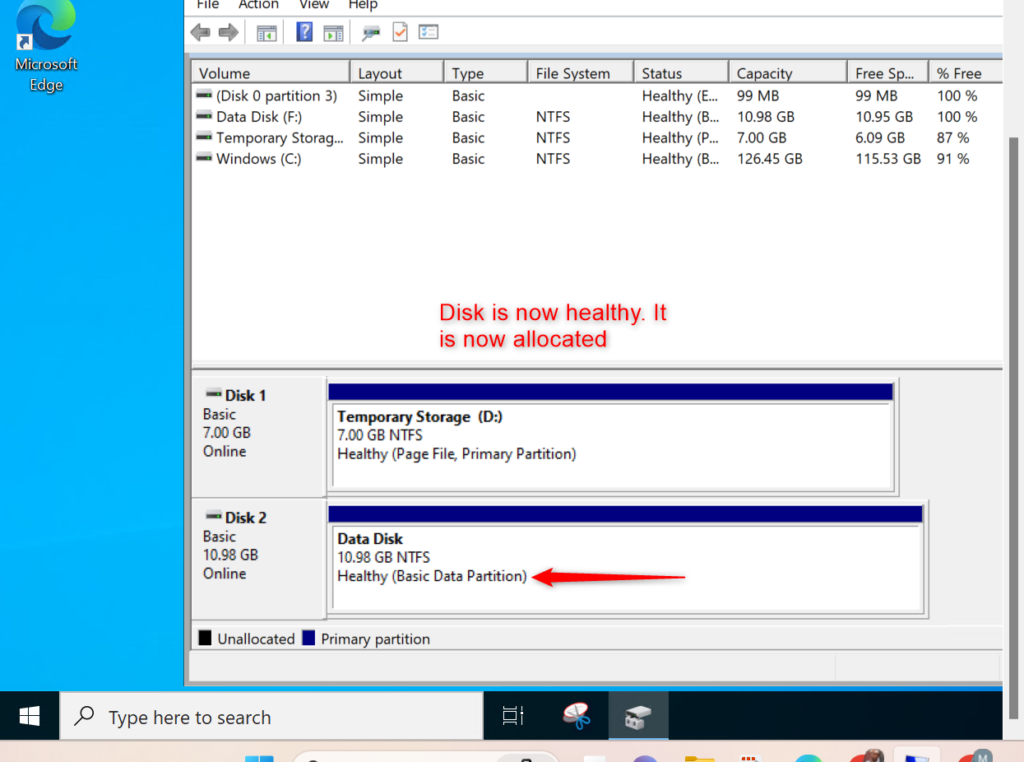
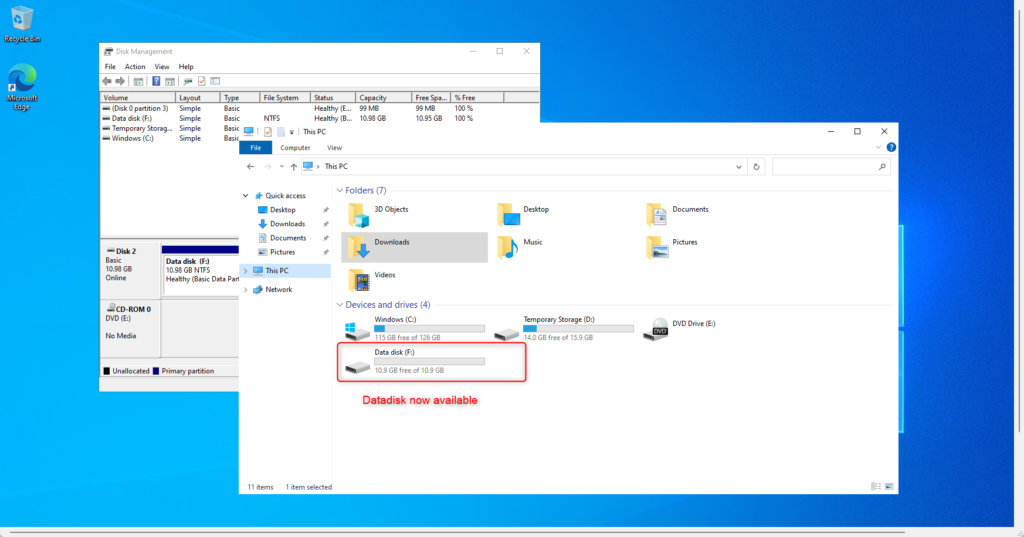
Disk is now healthy (allocated)and ready for use
Verify the Disk
Once the disk is successfully attached:
Open File Explorer.
You should see the new disk(Data disk) in drive (F);
The disk is now ready for use!
Best Practices for Managing Data Disks
- Back Up Data Regularly
Always maintain backups of essential files to safeguard against data loss or corruption. - Track Disk Performance
Leverage tools such as Performance Monitor to verify disks are operating efficiently and address issues proactively. - Adjust Disk Size as Required
In cloud-based systems, flexibly adjust the size of data disks to scale storage as your workload grows.
Conclusion
Configuring a data disk in a Windows VM is straightforward. Following these guidelines ensures your disk is optimized for storage and application demands. Effective management boosts organization, enhances performance, and supports seamless scalability, enabling your systems to adapt to changing needs.

